


 |
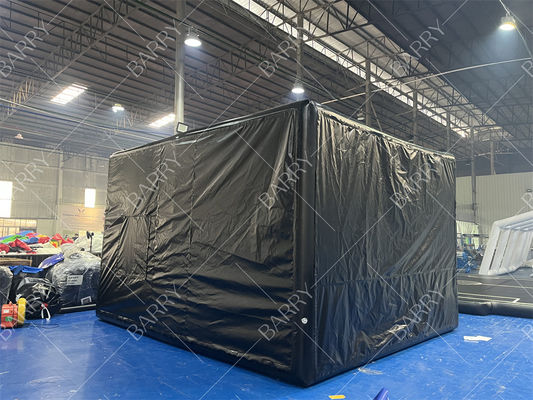
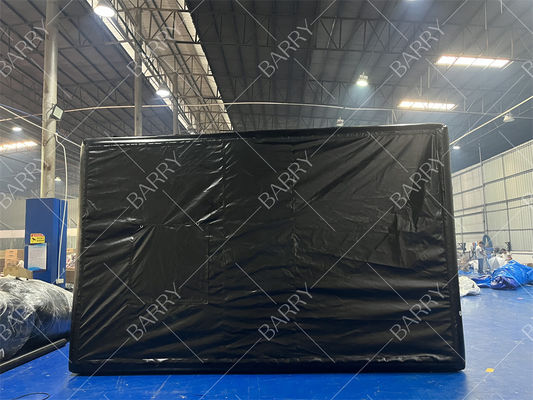
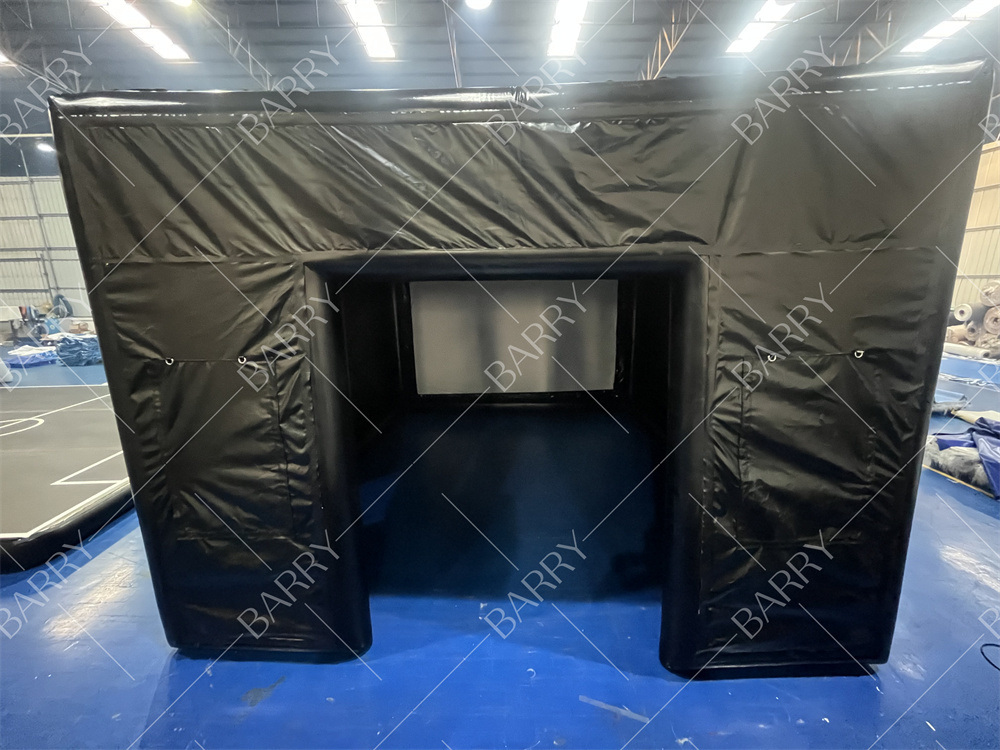
Portable Inflatable Outdoor Golf Simulator Enclosure With Hitting Screen
Detalhes do produto:
| Lugar de origem: | Cantão,China |
| Marca: | Barry |
| Certificação: | CE,EN71,14960,SGS,SCT,BSCI,ROHS |
| Documento: | Folheto PDF do produto |
Condições de Pagamento e Envio:
| Quantidade de ordem mínima: | 1 |
|---|---|
| Preço: | Negotiate |
| Detalhes da embalagem: | O produto é embalado por uma forte bolsa de PVC e caixa para soprador, bomba e outros acessórios |
| Tempo de entrega: | 7-15 |
| Termos de pagamento: | T/T, Paypal, Western Union, conforme necessário |
| Habilidade da fonte: | 10000/mês |
|
Informação detalhada |
|||
| Item: | Simulador de golfe inflável | Tamanho: | 4,5x5,25x3,3m |
|---|---|---|---|
| Impressão: | Impressão digital/impressão em serigrafia | Logotipo: | Aceitar personalizado |
| Material: | Travessia de PVC de 0,6 mm de alta qualidade | tempo de produção: | 7 a 15 dias úteis |
| Uso: | Jogo de golfe | Métodos de envio: | Por via marítima, aérea, expressa (DHL, etc.) |
| Controle de qualidade: | Departamento de Qualidade Profissional | ||
| Destacar: | portable inflatable golf simulator,outdoor golf hitting screen,inflatable golf enclosure tent |
||
Descrição de produto
Portable Inflatable Outdoor Golf Simulator Enclosure With Hitting Screen
Product Description:
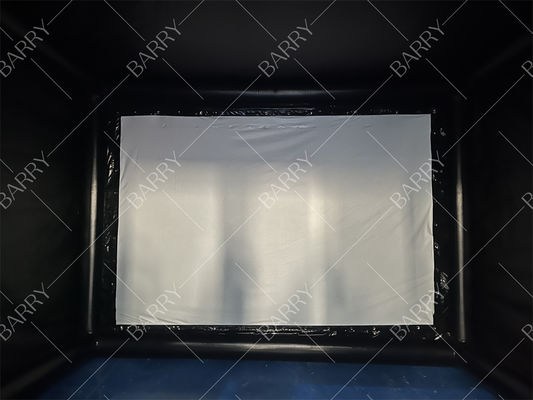
Deluxe Inflatable Golf Simulator Tent: Elevate your game with our deluxe tent, offering a high-definition screen and realistic turf. This inflatable tent combines portability with state-of-the-art simulation technology, making it ideal for enthusiasts who crave a professional experience at home.
![]()
Applications:
How to use?
Using an inflatable golf simulator enclosure is relatively straightforward, but it involves a few key steps to ensure you get the most out of your setup. Here’s a general guide on how to use one:
1. Setting Up the Enclosure
-
Choose a Location: Select a flat, open area with enough space for the enclosure and for you to swing comfortably. Ensure the area is free from sharp objects or obstacles.
-
Unpack the Enclosure: Carefully remove the enclosure from its packaging. Check that all components, such as the inflatable structure, stakes, and any accessories, are included.
-
Inflate the Enclosure:
- Connect the blower to the designated inlet valve on the enclosure.
- Turn on the blower to start inflating. The enclosure will typically inflate within a few minutes. Ensure that the enclosure is fully inflated and properly sealed.
-
Secure the Enclosure:
- Once inflated, anchor the enclosure to the ground using stakes or weights to prevent it from moving. Make sure it is stable and secure.
-
Install the Simulator Equipment:
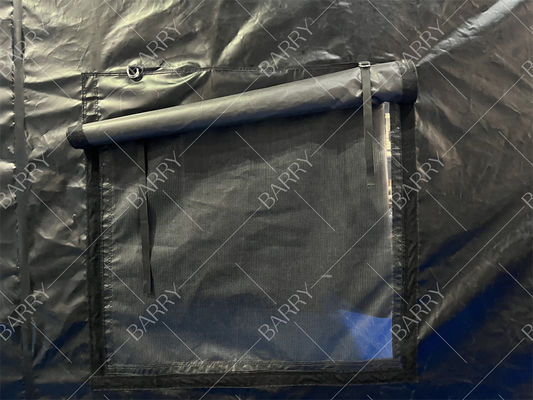
- Position the projector or screen according to the manufacturer’s instructions. Ensure it is properly aligned with the hitting area.
- Set up any sensors, cameras, or other simulation equipment. Connect them to a power source and ensure they are functioning correctly.
2. Preparing for Use
-
Calibrate the System: Follow the manufacturer’s instructions to calibrate the simulator. This often involves adjusting the sensors and aligning the projector or screen to ensure accurate readings.
-
Set Up the Hitting Area: Place the hitting mat and golf ball area within the enclosure. Ensure that it is securely positioned and that there is ample space for a full golf swing.
-
Connect to Power and Devices:
- Ensure that all devices, such as the projector, sensors, and any computers, are properly connected to power and operational.
- Connect any software or apps required for the simulation to the equipment.
3. Using the Enclosure
-
Warm-Up and Practice: Enter the enclosure and begin with warm-up swings or practice shots. The simulation should provide feedback on your swings and shots.
-
Play Simulation Games: Use the simulator’s software to select a golf course or game mode. Follow the prompts to start playing. The system will track your shots and provide detailed feedback.
-
Adjust Settings: Depending on the software and equipment, you may have options to adjust settings like difficulty, weather conditions, or course layout.
4. Maintenance and Storage
-
After Use:
- Carefully deflate the enclosure by turning off the blower and opening the release valves.
- Allow the enclosure to fully deflate before folding it.
-
Clean the Equipment: Wipe down any equipment and the interior of the enclosure if necessary.
-
Store Properly:
- Fold the deflated enclosure and store it in a dry, cool place.
- Ensure that all components are kept together and are protected from damage.
-
Regular Checks: Periodically check the condition of the enclosure and equipment to ensure everything remains in good working order.
By following these steps, you can effectively set up and use your inflatable golf simulator enclosure for practice and enjoyment. Always refer to the specific instructions provided by the manufacturer for detailed guidance tailored to your model.
Quality Standards:
1. High quality Plato PVC material.
2. Double stitching inside and outside.
3. Quadruple stitching for the stress-bearing parts and the joint parts.
4. Reinforcement belts webbing reinforces for some parts.
5. Full-digital printing protected by a liquid protection film.
6. Enough zipper outlets to deflate the slide quickly.
7. Extra soft handles for climbing area.
8. Anchor rings all over the castles.
9. Reinforcements for zipper joints.
10. Zipper cover with hook and loop fastener to disperse the stress for zippers.
11. Our workers have over 10years experience of the inflatable field . We have our own designers.
So for any custom designs or sizes, are acceptable. Also provide you good ideas as a reference.
12. Strict quality control. CE, UL, ASTM, EN14960, EN71, NFPA 701 No Lead, Fire Retardant certifications.
13. Good after-service. Deal with customs' question,request, problem in time.
14. Price control. Promise at the base of high quality,offer best competitive prices. Enjoy different discounts.